Problem Set 1: Introduction to Python
Preliminaries
In your work on this assignment, make sure to abide by the:
- Collaboration policies of the course.
- Python coding standards.
If you have questions while working on this assignment, please come to office hours, post them on Piazza.
-
Make sure to submit your work on Gradescope, following the procedures found at the end of the assignment.
-
You may not use ChatGPT or any similar AI tools to write solutions for this problem set. Students who submit ChatGPT-generated solutions will earn a grade of 0 on this problem set.
Problem 1: The four fours challenge
20 points; individual-only
The material needed for this problem will be discussed in class. You can find more information in the pre-class readings and videos for the first class on Python.
In this problem you will write a simple Python program that computes the integers 0 through 4 using expressions involving exactly four fours and no other numbers. For example:
zero = 4 + 4 - 4 - 4
Your expressions may use any of the following operators:
+, -, *, // (integer division), ** (power), and parentheses.
Note that you should use the integer division operator (//) instead
of the regular division operator (/), because the /
operator will cause your results to include a decimal. For example,
4//4 will give you 1, but 4/4 will give you 1.0.
Begin by downloading this file: ps1pr1.py
Rick-click on the link, and use “Save As...” to save the Python file to your computer.
Open ps1pr1.py in Spyder using the File->Open menu option.
In the editor window the file should look like this:
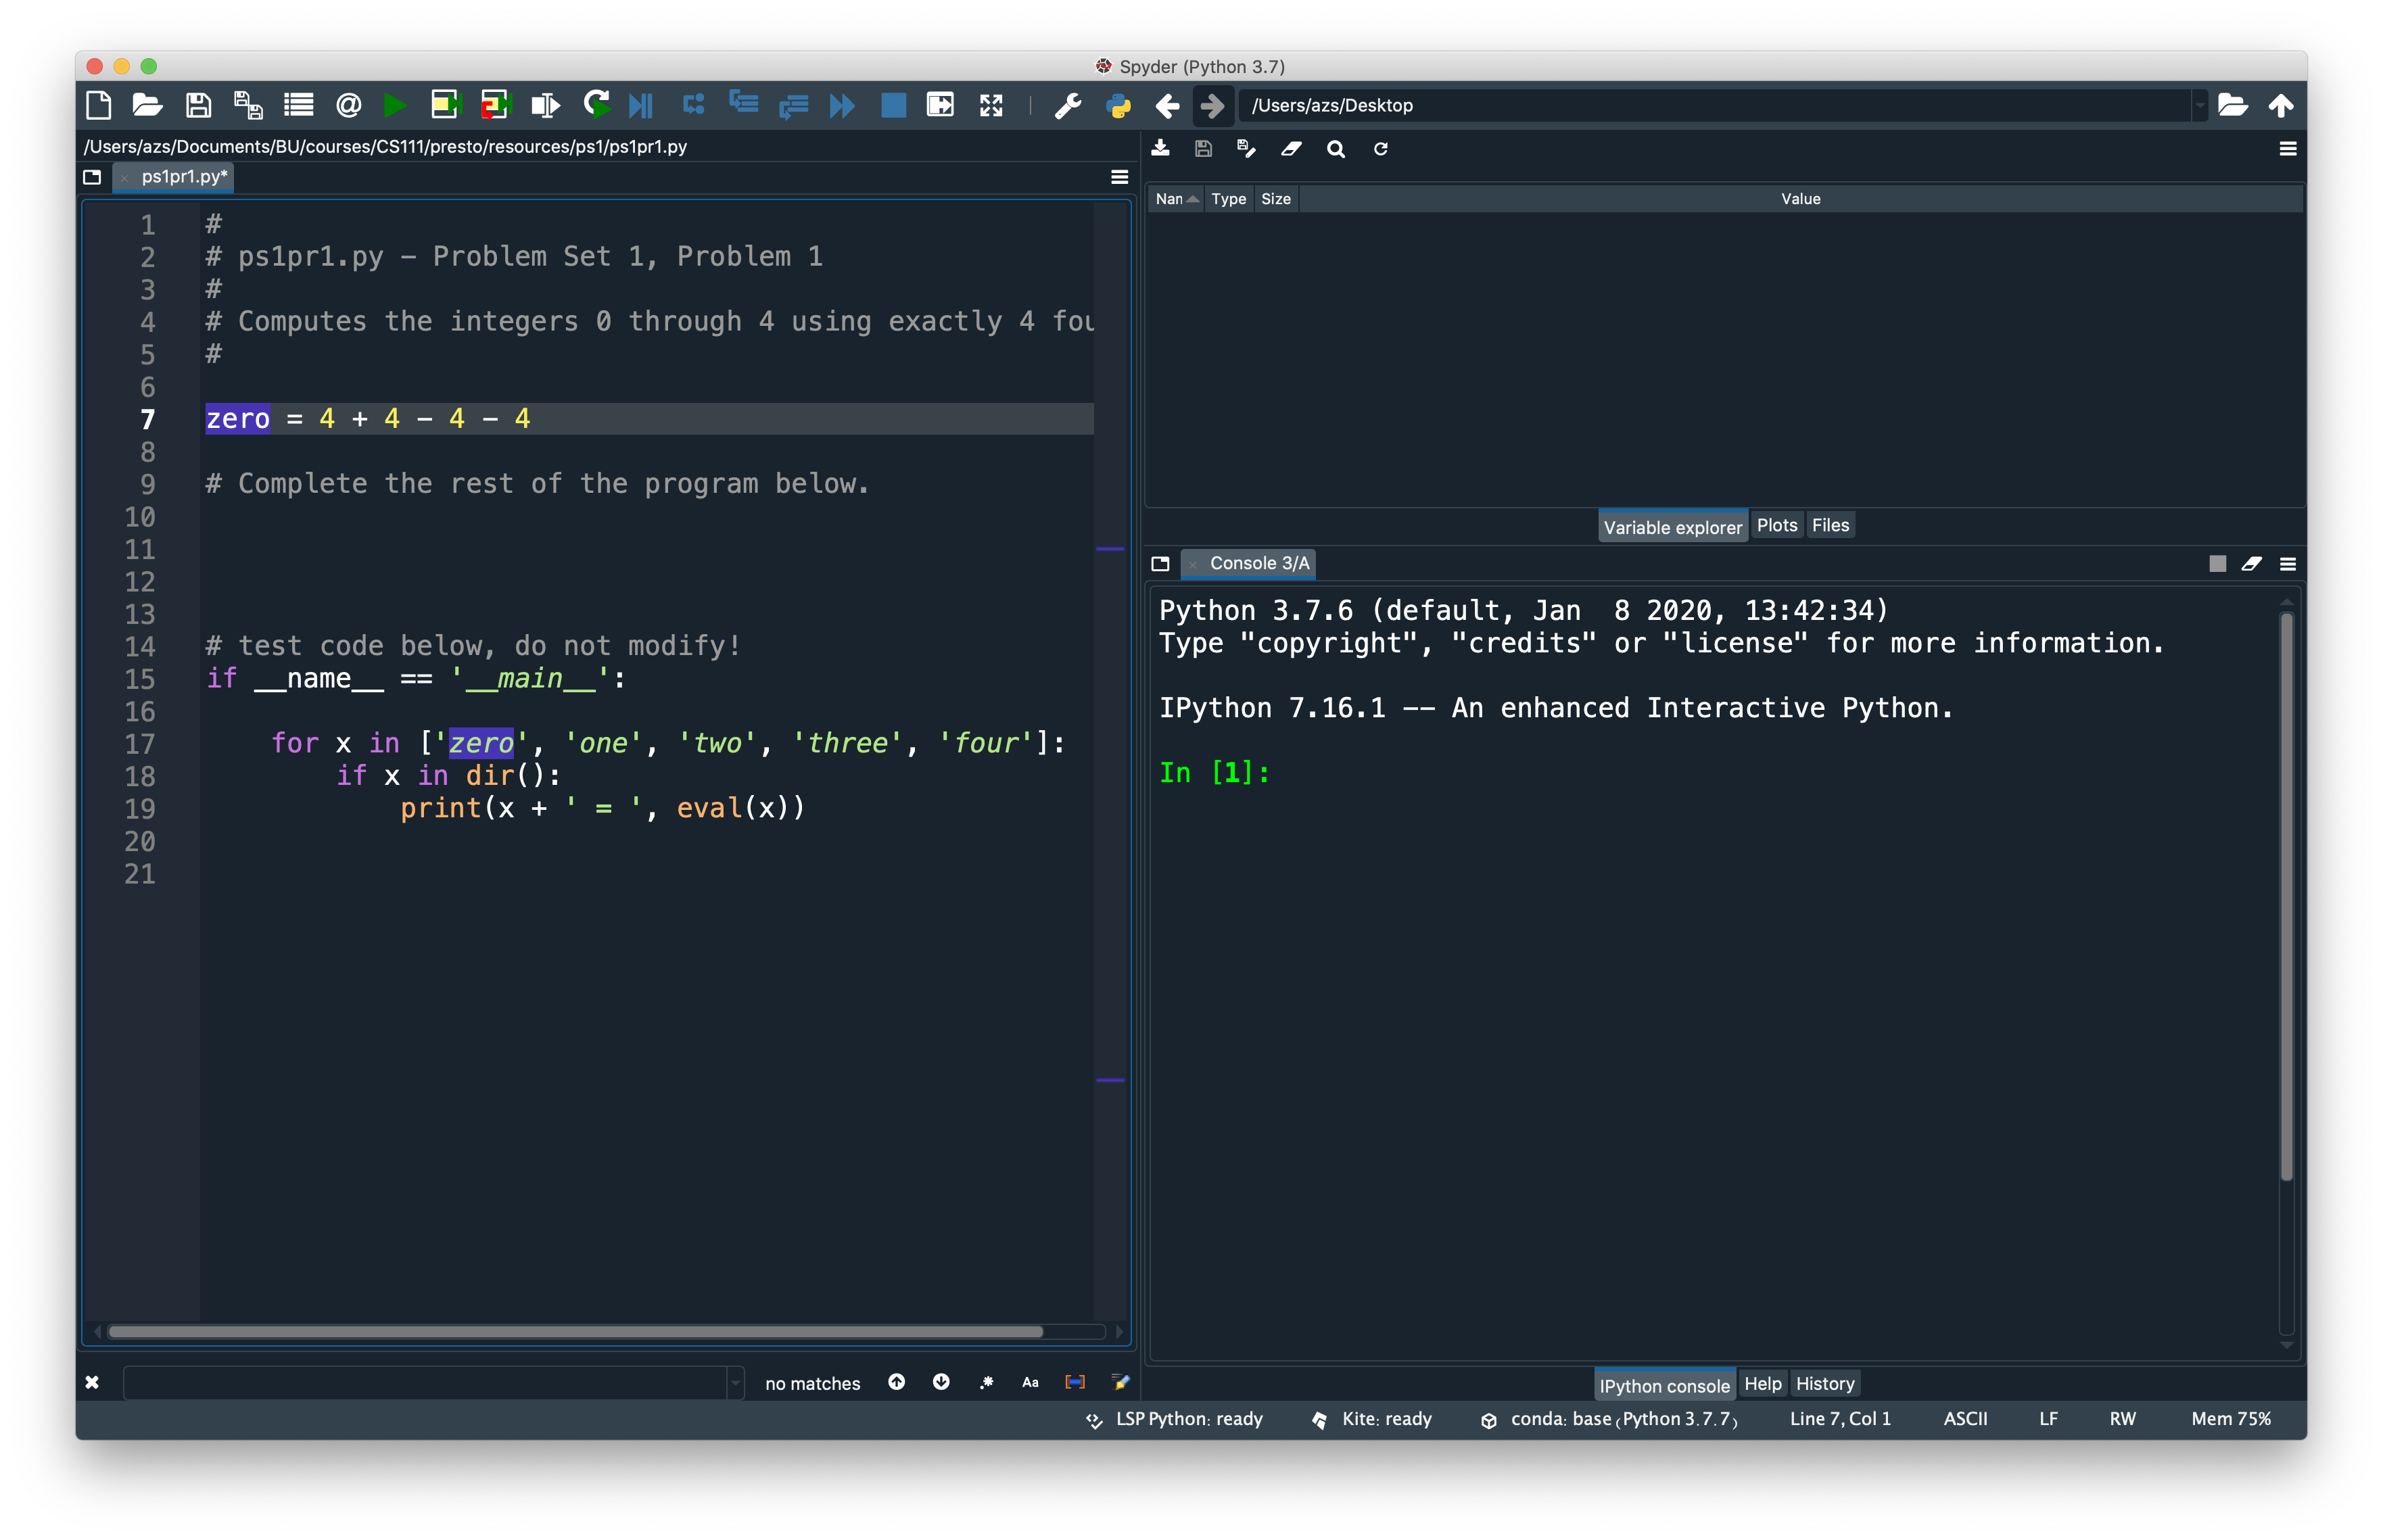
To test the code, click the Run File button (F5 hotkey).

The output of your code should appear in the integrated console on the right. The output should appear in a white font, and it should look like this:
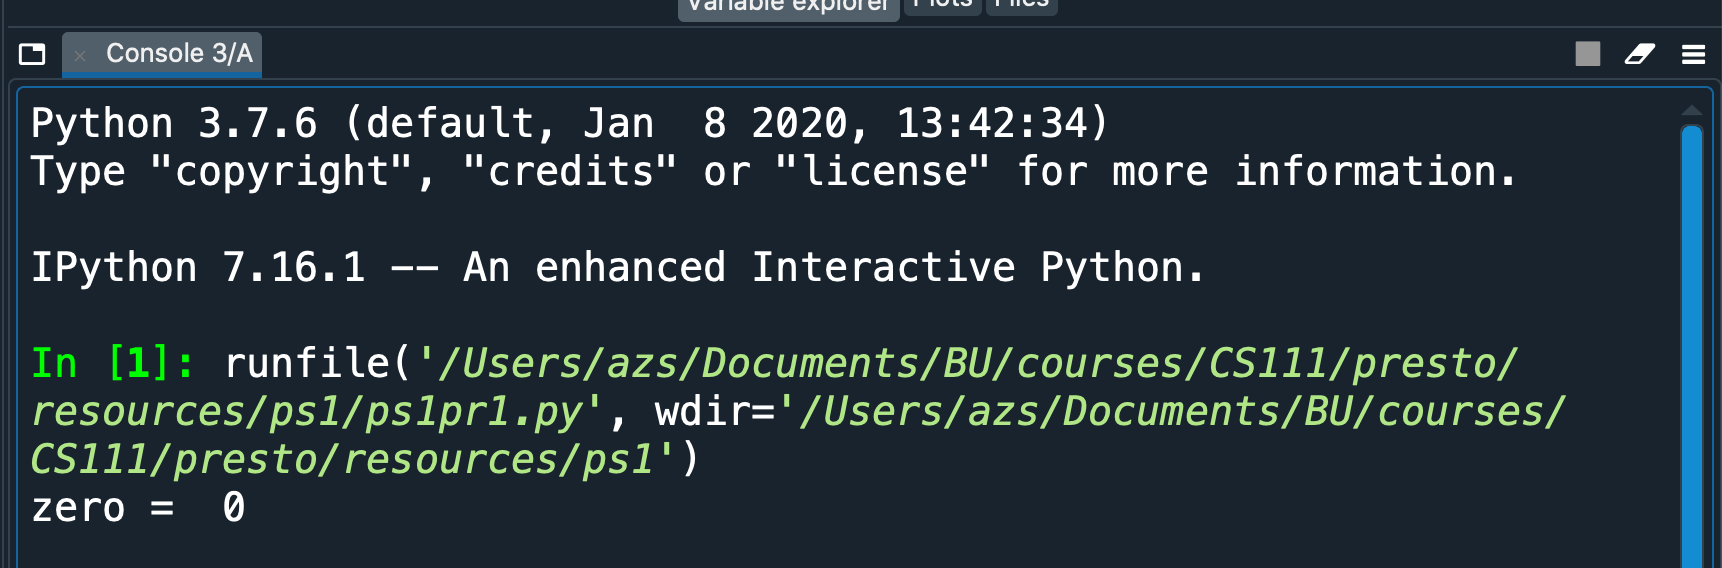
We have given you an example expression for computing the value 0.
You will add in the code needed to compute the integers 1 through 4 using four fours. For each integer, you must assign the result of the computation to a variable with the name of that number. Test each expression as you go by running the program. When complete, the output should look like this:
zero = 0
one = 1
two = 2
three = 3
four = 4
Notes:
-
There are multiple ways to compute a given integer. For example, here is an alternative approach for 0:
zero = 4//4 - 4//4 -
We encourage you to try to come up with each of the expressions on your own. However, the real point of this problem is getting comfortable with Python, so if you have trouble coming up with an expression for a given number, feel free to ask a classmate or one of the course staff members, or to consult information about the four fours challenge that is available online. However, please do not post your expressions on Piazza for everyone to see.
Problem 2: Making change from a dollar
20 points; individual-only
Begin by downloading the starter-code file
ps1pr2.py.
Rick-click on the link, and use “Save As...” to save the Python file to your computer.
Write a program that, given a price in cents that is less than a dollar (i.e., 100 cents), determines the method of giving change that uses the fewest coins. The program will not take input from the user, but rather it will begin with a hard-coded value for the price, i.e.:
price = 67
The result of the program should be given in the format below: pennies (1 cent) first, then nickels (5 cents), dimes (10 cents), and quarters (25 cents), each on a separate line):
Here’s an example of the output, given an intial price of 67 cents:
The price of your item is 67 cents, and your change is 33 cents.
Here's the change that uses the fewest coins:

    pennies: 3
    nickels: 1
    dimes: 0
    quarters: 1
Note: this program can be done with only the arithmetic operators:
+ - // * %. In addition, you must create variables (pennies, nickels, dimes,
and quarters) to hold the values you have caculated.
You may include any additional variables you choose.
Your finished program should print out the results, similar to the example above.
There is no need for if statements or anything else we have not discussed yet.
Designing and Planning Your Solution: Pseudo code and Comments
The most successful way to write this kind of program is to begin by thinking about the algorithm and outlining the steps required in the order they need to be performed. Pseudo-code is a way to write the steps of your algorithm without worrying about specific Python syntax.
To begin, write out pseudo code as comments (beginning with #) for each step you need to take, one per line. After you have the steps logically worked out as pseudo code, go back and write in the python code for each step. Do not delete the pseudo code! This is your program documentation and should remain in the finished product.
Practicing Step-wise Refinement
It is crucial that you get into the habit of writing a small amount of code and testing it thoroughly. You should work through this assignment using step-wise refinement as follows. For each step below, you should write the code, and then test your program to verify that each step works correctly.
a. Begin a program with a hard-coded price, find the change (in cents), store it in a variable, and print it out.
b. Continue your program by finding the number of quarters required for the change, and storing this amount in a variable. Hint: use integer division. Print out the number of quarters.
c. Continue by finding the number of dimes. Hint: how much change is left after you found the number of quarters?
d. Continue to find the number of nickels and pennies.
e. Revise/reorder your print statements to obtain the specified output (above).
Testing your program
Once you believe that you have a working program (i.e., no syntax erros that prevent it
from running), you must test it thoroughly for correctness. That is, you must try
different values for the price, by changing the single line that assigns a value to
the variable price.
For example, try changing the price to 1; the result should be 99 cents of change. Try other permutation to be certain that your program will work for ANY value of price less than 100. As you test, you might discover logical/arithmetic errors in your work. This is expected! Use this as an opportunity to revise your work to achieve a correct solution.
Problem 3: Indexing and slicing puzzles
30 points; individual-only
This problem will give you practice with indexing and slicing.
Begin by downloading this file: ps1pr3.py.
Rick-click on the link, and use “Save As...” to save the Python file to your computer.
Open the in Spyder, following the procedure outlined in class.
List puzzles
The first half of the problem focuses on lists. In particular, you
will be constructing new lists from the following:
pi = [3, 1, 4, 1, 5, 9]
e = [2, 7, 1]
We’ve given you these lines in ps1pr2.py. In addition, we’ve provided
the answer to the first puzzle (puzzle 0). You should add in the
answers for the remaining puzzles, following the format that we’ve
given you for puzzle 0.
The expressions that you construct must only use
pi and e and the following list operations:
- list indexing (e.g.,
pi[0]) - list slicing (e.g.,
e[1:]orpi[2:4]) - skip-slicing (e.g.,
pi[6:4:-1]) - list concatenation (e.g.,
pi[:1] + e[1:]. Note that you may not use+to add values numerically.) - list construction (e.g.,
[e[2]]or[e[2], e[0]])
We encourage you to try using as few operations as possible, to keep your answers elegant and efficient. However, you will get full credit for any expression that follows the rules above and produces the correct result.
Before getting started, you should run ps1pr2.py in Spyder using
F5. This will make the lists pi and e available to you in the
Python Shell.
Here are the puzzles:
-
Use
piand/oreto create the list[2, 5, 9], and assign it to the variableanswer0. We’ve given you the code for this puzzle. -
Use
piand/oreto create the list[2, 7]and assign it to the variableanswer1. Your answer should follow the format that we’ve given you for problem 0. In other words, it should look like this:# Puzzle 1: # Creating the list [2, 7] from pi and e answer1 =
where you put the appropriate expression to the right of the assignment operator (
=). Please leave a blank line between puzzles to make things more readable. -
Use
piand/oreto create the list[5, 4, 3], and assign it to the variableanswer2. Here again, make sure to follow the correct format, and to leave a blank line between puzzles. -
Use
piand/oreto create the list[3, 5, 7], and assign it to the variableanswer3. (Optional challenge: See if you can do this with just three list operations!) -
Use
piand/oreto create the list[1, 2, 3, 4, 5], and assign it to the variableanswer4. (Optional challenge: See if you can do this with just three list operations!)
String puzzles
The second half of the problem focuses on strings. In particular, you
will be working with the following strings:
b = 'boston'
u = 'university'
t = 'terriers'
We’ve given you these lines in ps1pr2.py, along with the answer
to the first string puzzle (puzzle 5). Run the file as needed so that
the strings will be available for you to experiment with in Spyder.
The expressions that you construct for the remaining puzzles must only use the above strings and the following string operations:
- string indexing (e.g.,
b[0]) - string slicing (e.g.,
u[1:]ort[2:4]) - skip-slicing (e.g.,
u[6:4:-1]) - string concatenation (e.g.,
b + u) - string repetition (e.g.,
5*bor3*u[-1])
Here again, you will get full credit for any expression that follows the rules above and produces the correct result, but we encourage you to try using as few operations as possible.
Here are the puzzles:
-
Use
b,u, and/ortto create the string'bossy', and assign it to the variableanswer5. We’ve given you the following code for this puzzle:# Puzzle 5: # Creating the string 'bossy' answer5 = b[:3] + t[-1] + u[-1]
Note that our answer involves 5 operations: 2 uses of indexing, 1 slice, and 2 concatenations with
+. (It’s actually possible to solve this puzzle using only 3 operations. Give it a try if you have time!) -
Use
b,u, and/ortto create the string'universe', and assign it to the variableanswer6. (Our best answer uses 3 ops.) Here again, make sure to follow the correct format, and to leave a blank line between puzzles. -
Use
b,u, and/ortto create the string'roster', and assign it to the variableanswer7. (Our best: 5 ops.) -
Use
b,u, and/ortto create the string'boisterous', and assign it to the variableanswer8. (Our best: 8 ops.) -
Use
b,u, and/ortto create the string'yesyesyes', and assign it to the variableanswer9. (Our best: 4 ops.) -
Use
b,u, and/ortto create the string'trist', and assign it to the variableanswer10. (Our best: 4 ops.)
After finishing all of the puzzles, make sure to run your
ps1pr3.py file to check that the correct outputs are printed.
Problem 4: Functions with numeric inputs
30 points; individual-only
In this problem you will write a collection of simple functions that operate on numeric inputs.
Begin by downloading this file: ps1pr4.py.
Rick-click on the link, and use “Save As...” to save the Python file to your computer.
Open the in Spyder, following the procedure outlined in class.
Here are the descriptions of the functions:
-
(example) Write a function
opposite(x)that takes a numberxas its input and returns the opposite of its input. We have given you this example function in the starter file. -
Write a function
cube(x)that takes a numberxas its input and returns the cube of its input (i.e.,xraised to the power of 3). For example:>>> cube(2) 8 >>> print(cube(-5)) -125
Warning
Make sure that your function returns the correct value rather than printing it. If your function is printing the return value, you will see the word
Noneas part of the output for the second test above. If you are seeingNonein your output, you must fix your function so that it uses areturnstatement rather than aprintstatement. This same warning applies to all of the functions that you will write for this assignment.Note: You should leave one or two blank lines between functions to make things more readable, and make sure to include a docstring like the one in our example function.
Warning
Make sure that you use the correct amount of indentation. In particular, your docstrings should be indented by 4 spaces as shown in our code for
opposite, so that they line up with the code inside the function. -
Write a function
convert_to_inches(yards, feet)that takes two numeric inputsyardsandfeetthat together represent a single length broken up into yards and feet, and that returns the corresponding length in inches.For example:
>>> convert_to_inches(4, 2)  # 4 yards + 2 feet = 168 inches
168
>>> print(convert_to_inches(1, 1))  # 1 yard + 1 foot = 48 inches
48
Notes:
-
1 foot is 12 inches, and 1 yard is 3 feet or 36 inches.
-
You may assume that all parameters are greater or equal to 0. You do not need to handle negative values.
-
-
Write a function
area_sq_inches(height_yds, height_ft, width_yds,
    width_ft)
that takes four numeric inputs:height_ydsandheight_ftthat together represent the height of a rectanglewidth_ydsandwidth_ftthat together represent the width of a rectangle
Based on these inputs, the function should return the area of the rectangle in square inches. In other words, it should:
- determine the height of the rectangle in inches
- determine the width of the rectangle in inches
- return the product of those two values
Examples:
>>> area_sq_inches(1, 2, 3, 1)  # (1 yd, 2 ft) x (3 yds, 1 ft) = 7200 sq inches
7200
>>> print(area_sq_inches(2, 0, 1, 2))  # (2 yds, 0 ft) x (1 yd, 2 ft) = 4320 sq inches
4320
Notes:
-
We strongly encourage you to start by making two calls to the
convert_to_inchesfunction that you wrote earlier—one call to compute the height in inches, and one call to compute the width in inches–and store the results of those calls in variables. Then you can use those variables to compute the area. -
You may assume that all parameters are greater or equal to 0. An earlier version of this assignment mentioned negative values, but you do not need to handle negative values.
Don’t forget to test your functions using the approaches mentioned at the start of the problem.
You may also find it helpful to use the Python Tutor Visualizer to
trace through the execution of your functions – either to
verify that they’re working as expected, or to determine why they’re
not working! Paste your function definition into the Visualizer’s code box,
and follow the definition with code that calls the function. Then click
the Visualize Execution button below the code box to begin the visualization.
For example, to test the circle_area function that we discussed in lecture,
you could paste the following into the Visualizer:
def circle_area(diam):
    radius = diam / 2
    area = 3.14159 * (radius**2)
    return area

# test case here; the function returns a result, which is printed out
print('circle_area(10)', circle_area(10))
Submitting Your Work
You should use Gradesope to submit the following files:
- your modified
ps1pr1.pyfile containing your solutions for Problem 1 - your modified
ps1pr2.pyfile containing your solutions for Problem 2 - your modified
ps1pr3.pyfile containing your solutions for Problem 3 - your modified
ps1pr4.pyfile containing your solutions for Problem 4
Warnings
-
Make sure to use these exact file names, or Gradescope will not accept your files. If Gradescope reports that a file does not have the correct name, you should rename the file using the name listed in the assignment page.
-
If you make any last-minute changes to one of your Python files (e.g., adding additional comments), you should run the file in Spyder after you make the changes to ensure that it still runs correctly. Even seemingly minor changes can cause your code to become unrunnable.
-
If you submit an unrunnable file, Gradescope will accept your file, but it will not be able to auto-grade it. If time permits, you are strongly encouraged to fix your file and resubmit. Otherwise, your code will fail most if not all of our tests.
Important note regarding test cases and Gradescope:
- You must test each function after you write it. Here are two ways to do so:
- Run your file after you finish a given function. Doing so will bring you to the Shell, where you can call the function using different inputs and check to see that you obtain the correct outputs.