Django Installation for Windows
Overview
These installation instructions are Windows-specific!
An installation script for MAC is located here.
Installation can be hard
-
The installation works for some people wihout any difficuly, but this is in fact unusual.
-
Many people have issues with the system path, version, etc., and the installation could become tedious. Have courage! The TAs and instructor and your classmates are here to help.
The commands below must be done one at a time. Make sure each one is successful before continuing to the next step. Please do not get hung up on version numbers. Use the latest version for any package you install!
Django Installation for Windows
On Windows, we can install django at the command line,
and use regular GUI installer for Git. We strongly recommend
using powershell instead of cmd, as powershell commands are more like
Mac (unix) command line.
Installing Django and Pipenv
Open powershell, which should provide a window that looks like this:

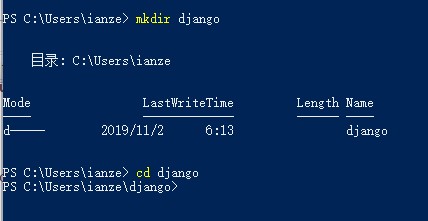
Run each of these commands that follow. Make new directory called django,
and then change your current directory to make sure that we are in it
(using the cd command).
mkdir django
cd django
Example output from running the cd command after successfully making the django directory:

Install the virtual environment
We will be using a virtual environment
called pipenv to manage all of our installed packages and any
dependencies. We are using a command line tool called pip, which is the
Python packing installation manager.
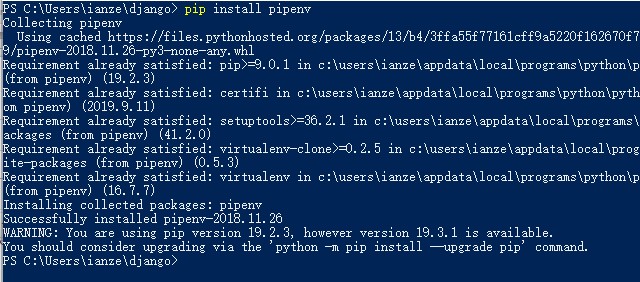
This command will install pipenv:
pip install pipenv
Note: pip is not recognized error
If you get a “pip is not recognized” or “pipenv not found” error, follow the steps in this article to add your Python scripts directory to the Windows system path.
Once you run the pip install pipenv command successfully, it will look
approximately like this:

Install Django:
We are installing Django (and all packages) into our
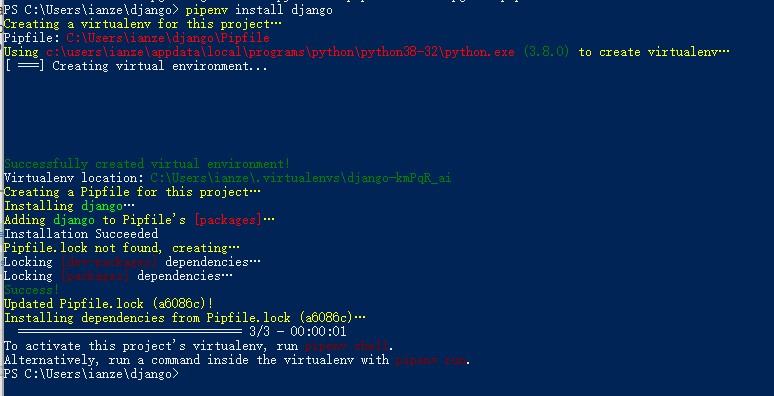
virtual environment (pipenv). Run this command to install Django:
pipenv install django
pipenv not recognized error
If you run into a pipenv not recognized error, there are two potential causes:
1) your pipenv was installed in a location other than the Scripts
folder on your path
Fix:
Find the file location and then add the folder containing
pipenv to your filepath. Ensure that the folder that has
pipenv installed is on your filepath.
2) pipenv is installed, but the Scripts folder is not on your path
Fix:
In this case, you correctly installed pipenv and we just need
to add its location to the PATH. Go to the previous section and follow
directions a-f to locate the /Scripts folder and add it to the PATH
If you get this far without “pipenv not recognized” error, you should be able to proceed.
Example output from launching the virtual environment:

Starting a New Django Project
The following Terminal commands are used to start a new Django project.
This assumes you have already changed into the django directory and
started the virtual environment (see above).
You should only need to start the project once (for the entire semester/course)
You must call your project cs412, because that is the name that the configuration
file expects.
You MUST have a trailing period at the end of the diang-admin startproject line.
# if needed, change into the django directory
cd django

# create/start the django project in the current directory
pipenv shell

# run this command to start your django project called 412.
django-admin startproject cs412 .
Running the Django Development Server
The following Terminal commands are used to start the virtual environment (pipenv shell) run the Django server.
You will need to do these every time you open a new Terminal window. You will always need to start the development server before you can test anything in a web browser.
(You do not need to type the comments!)
# if needed, change into the django directory
cd django

# start the virtual environment shell
pipenv shell

# run the django development server
python manage.py runserver
Did the installation work? You should seem some lines like this:
Starting development server at http://127.0.0.1:8000/ Quit the
server with CONTROL-C.
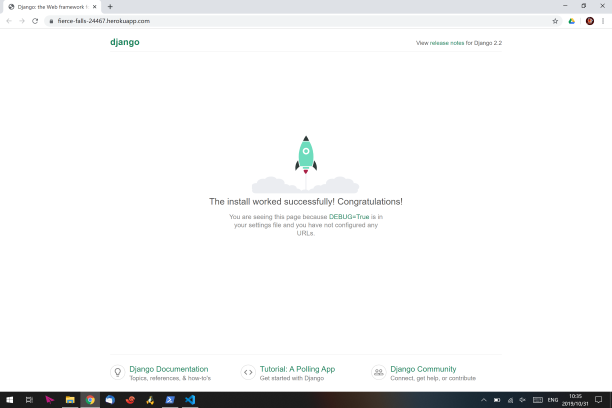
Test it by opening a browser to http://127.0.0.1:8000/.
If it worked, you will see a “Welcome to Django” page:

To stop the development server, use the keyboard sequence CONTROL-C.
Making and Applying Migrations
The following Terminal commands are used to make and apply database
changes to the Django development environment. This assumes you have
already changed into the django directory and started the virtual
environment (see above). You will need to do this when changes have been
made to the database models (this will be explained in part 2 of our
course).
(You do not need to type the comments!)
# create the migrations: the updates to the database models
python manage.py makemigrations

# apply the migrations
python manage.py migrate
Do you have suggestions for improving these instructions?
Please share them with Aaron.
[cs_people]: http://cs-people.bu.edu [putty]: https://www.putty.org/ [django_running]: ../resources/django_running.png [installation_mac]: